Chapter 5
Outputs: what goes to each display
Add outputs, choose what they show (feeds, mapping slices, projector, canvas) and send them to the right physical display.
An output is one picture that leaves the machine: usually a fullscreen window on a video port (HDMI, DisplayPort, SDI through a capture/playout card…), and optionally an NDI or Syphon stream. Each output has its own raster, the exact pixel size of that picture.
Add an output
Open the Outputs tab (next to Stage) and use +:
| Choice | What it is |
|---|---|
| 3D visualizer | A preview of the 3D stage |
| Whole canvas | The whole canvas, scaled to the raster |
| Mapping (slices, one per screen) | Free slice mapping, with one slice per screen to start from |
| LED feed | Screen feeds for an LED processor (one screen, or All LED walls (one processor)) |
| Projector | What a projector of the stage sees |
Select an output and click Open in Output view (or pick it in the Output view’s drop-down) to see and edit its raster.
What an output shows: “Shows”
In the Inspector, Source → Shows decides what is in the raster.
Screen feeds (LED processors)
Each screen of the stage is placed inside the raster, exactly where the LED processor expects it.
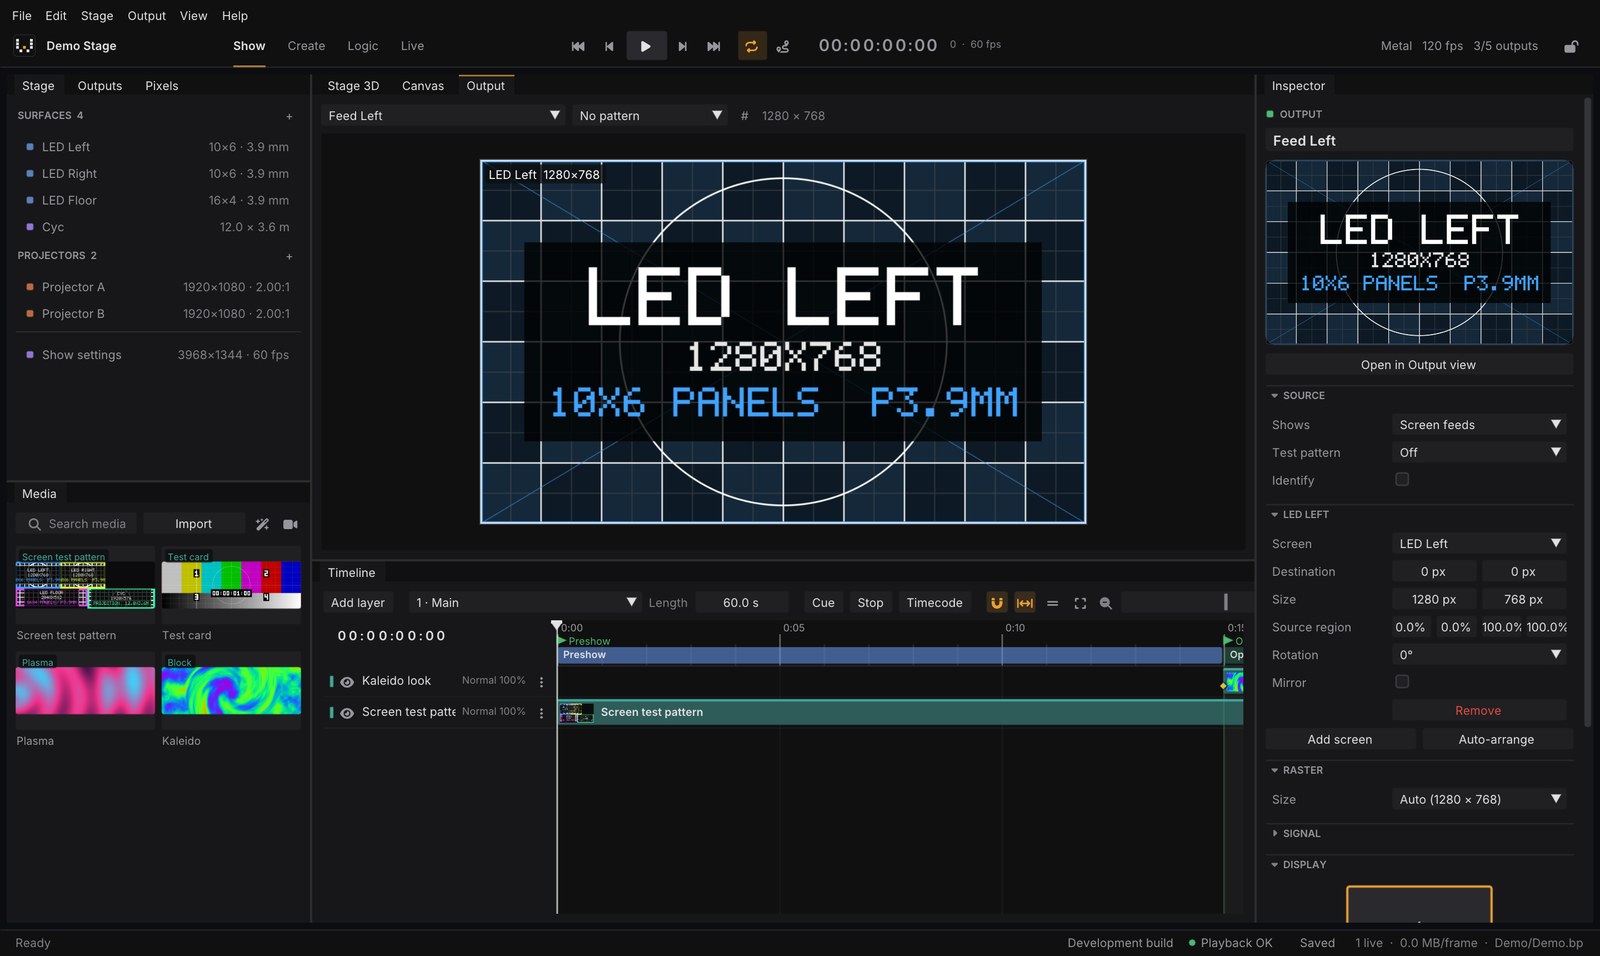
- Create the screen on the stage with its pixel resolution.
- Create an LED feed output with the processor’s raster (for example 3840 × 2160).
- Drag each screen into place in the Output view, or type its Destination and Size.
- Use Source region to split one screen over several outputs, and Rotation (0/90/180/270) and Mirror to match the cabling.
Mapping (slices)
Free mapping: each slice takes a region of the canvas, of a screen or of one layer (Input), and places it in the raster with a corner-pin or a curved grid warp (Output), with an optional polygon Mask and soft edges. The editor snaps to pixels, aligns and distributes several slices, can create slices from the screens automatically and imports slice presets from XML.
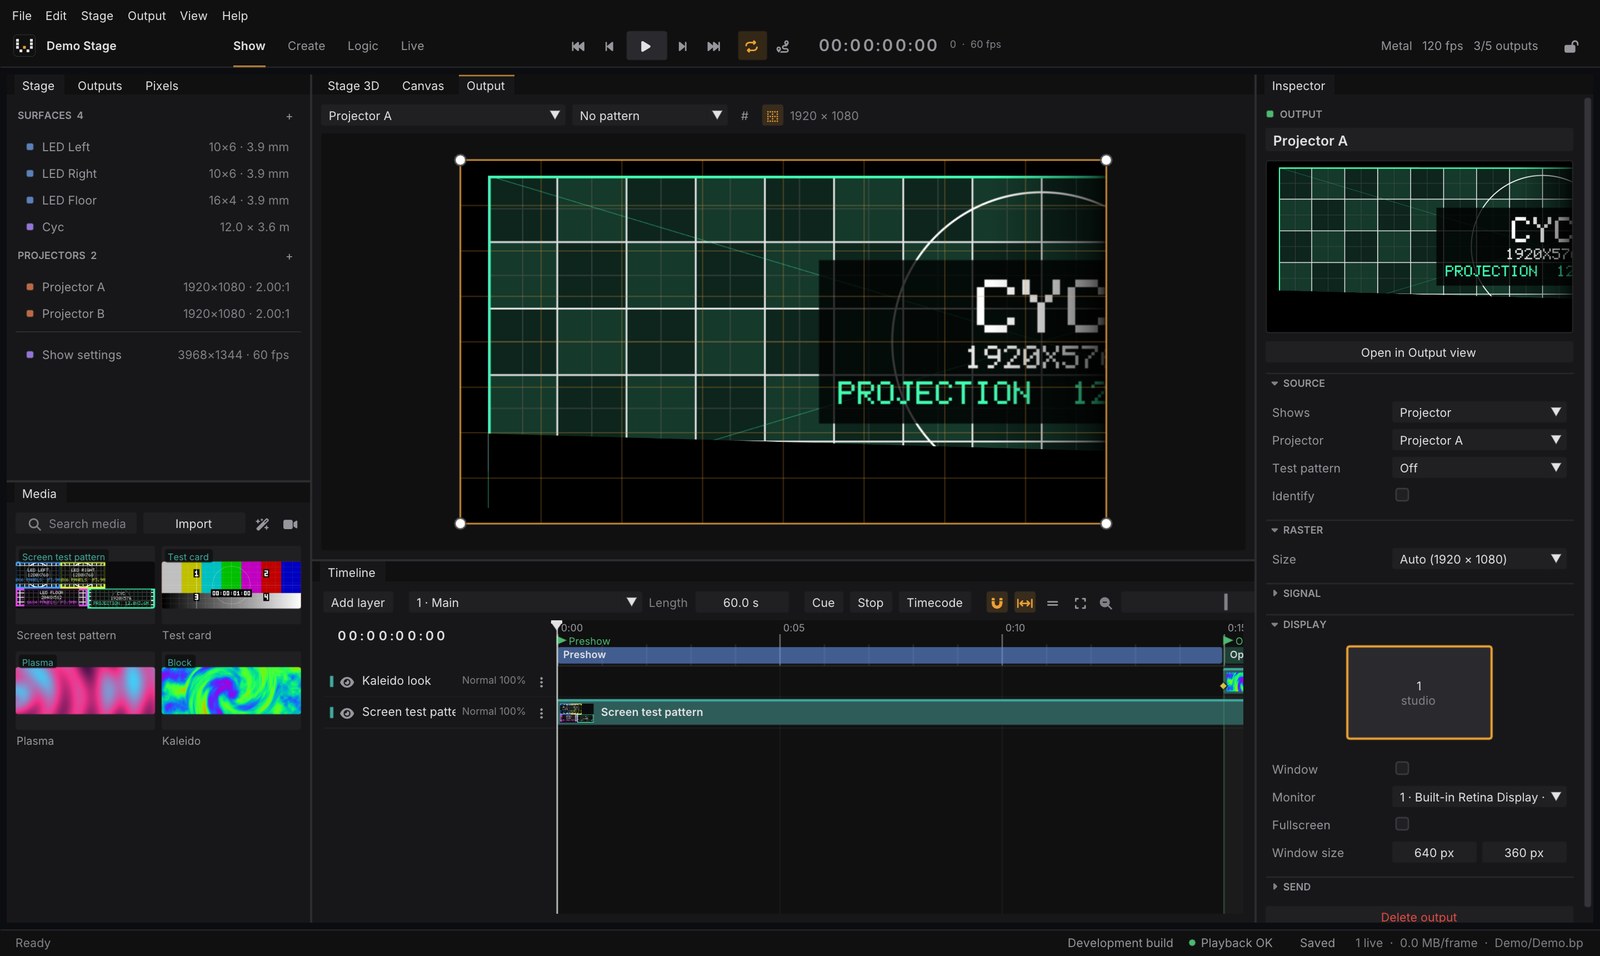
Projector
What one projector of the stage sees, with its warp and edge blend. In the Output view, drag the warp points; arrow keys nudge (Shift × 10) and right-click resets a point. For real rooms, the point calibration (QuickCal-style) solves position, orientation and lens from crosses you place on the real projection.
Canvas and 3D visualizer
Canvas shows the whole canvas scaled to the raster. 3D visualizer shows the stage in 3D, handy as a confidence monitor.
Choose the physical display
Select the output and open Display in the Inspector:
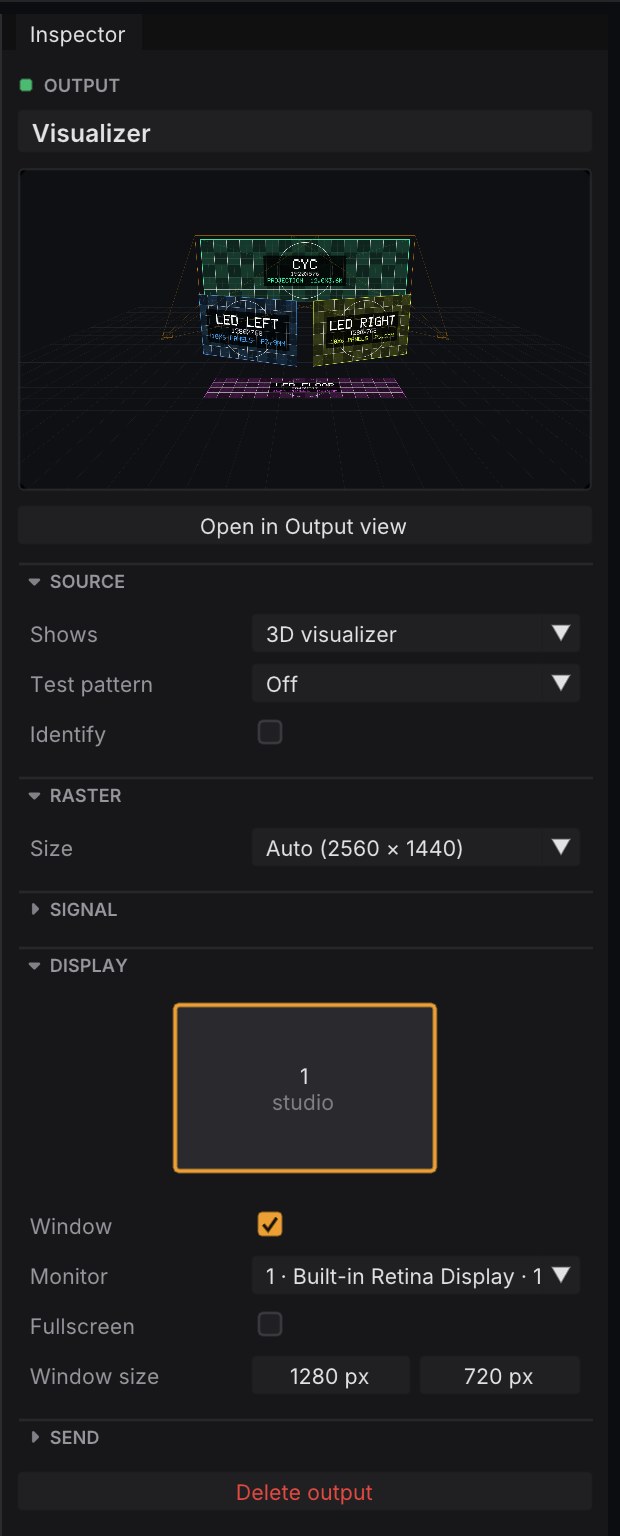
- Display map: the connected displays as the system arranges them. Click one to send the output there (the Monitor drop-down does the same).
- Window: opens or closes the output’s window.
- Fullscreen: covers the display at its native resolution, without changing the video mode. On macOS it also hides the menu bar and Dock on that display.
The output remembers the display by its name, with the number as a fallback, so it finds the right display again when the system lists them in another order. If that display is not connected, the output opens on another one and the Inspector says so (Not connected: opens on …).
Warnings to watch for
Mirrored with …: two displays in mirror (duplicate) mode show the same picture and cannot carry different outputs. Turn mirroring off in the system settings: macOS: System Settings → Displays, “Use as: Extended display”; Windows: Settings → Display, “Extend these displays”.
The studio is on this display: a fullscreen output there covers the studio, and
Escdoes not close it. Use another display, or turn the output’s Window off from another display.
Signal, patterns and Identify
- Signal: gain, contrast, gamma and RGB per output.
- Test pattern: grid, color bars, white, black and Sync check, to check cabling and alignment in the room.
- Identify: shows the output’s number and name on the display.
- Output → Identify outputs, Open all windows and Close all windows act on every output.
Send an output over the network (NDI, Syphon)
In the Inspector’s Send section, turn on NDI (other machines on the network; needs NDI Tools / the NDI Runtime installed) or Syphon (other apps on the same Mac; needs Syphon.framework). Set a Source name and a Frame rate (for 4K, limiting it to 30 fps is recommended). Send only makes pixelwright-node send the output without opening a window.
Heads-up: NDI and Syphon have been measured with a test receiver but not yet with real receivers. Check them with NDI Studio Monitor or Syphon Recorder before a show. Spout (Windows) and Blackmagic DeckLink are not available yet.